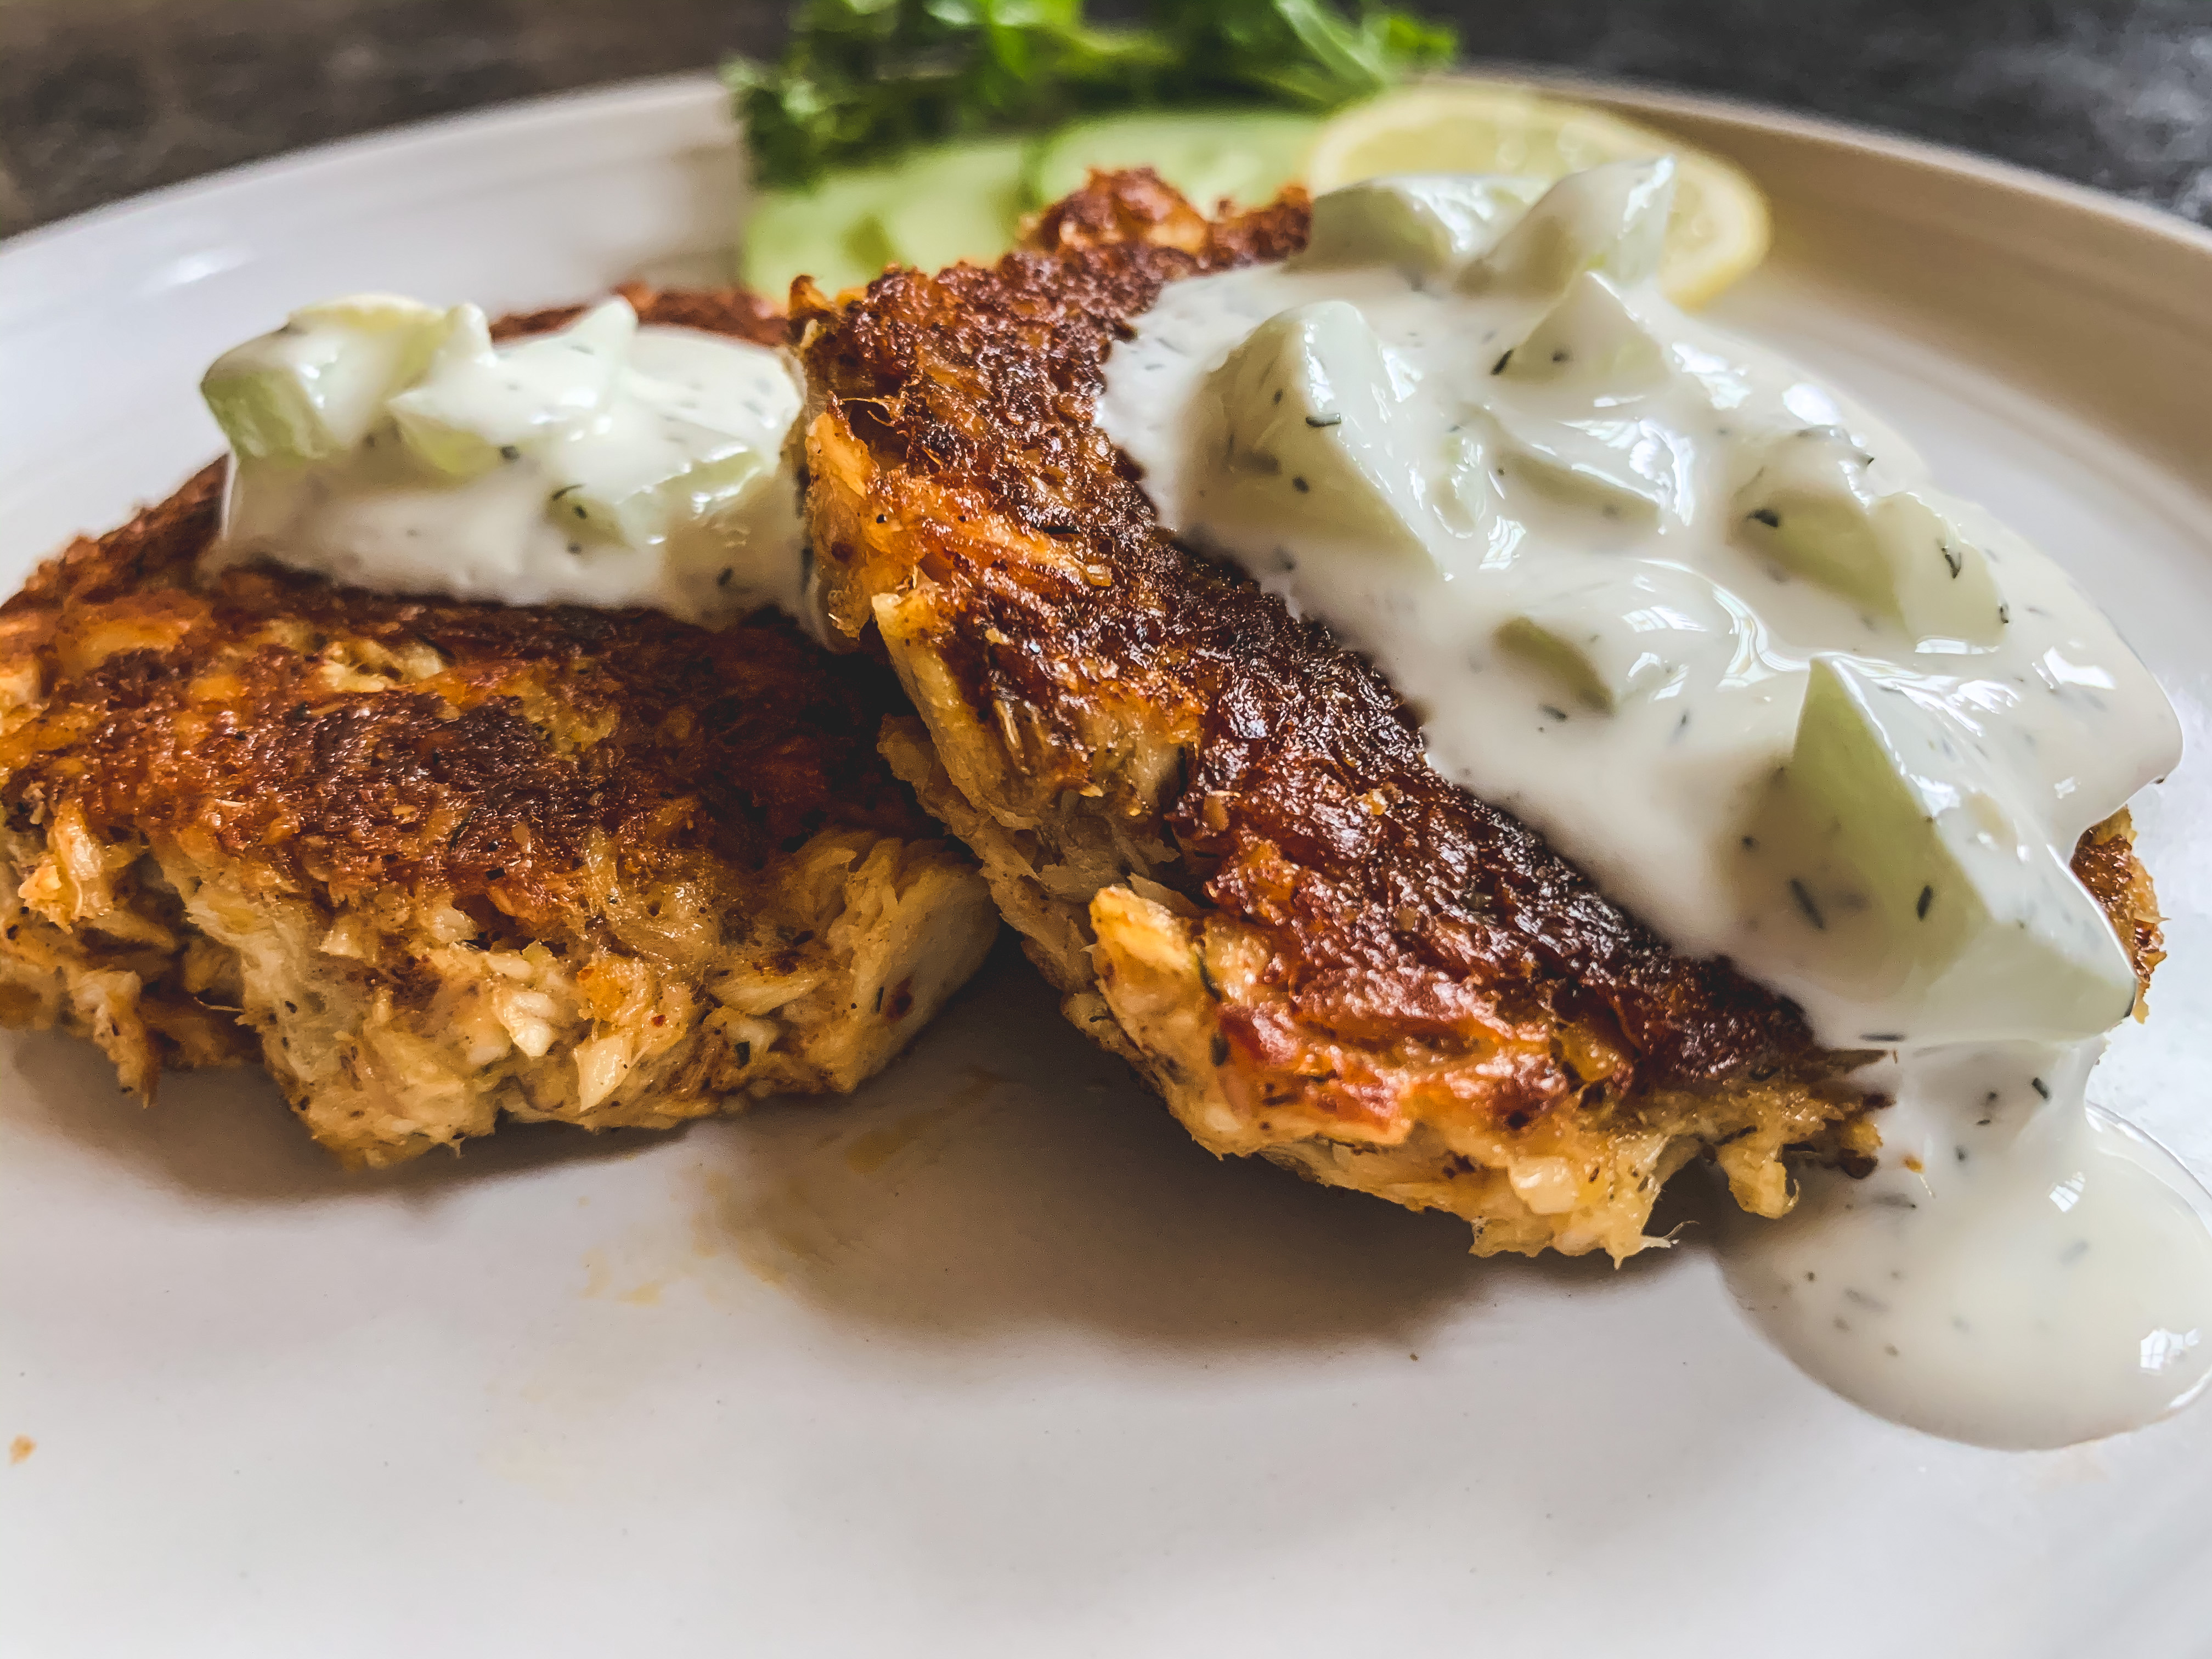
Lemon Dill Salmon Cakes with Cucumber Tzatziki Sauce (Gluten-Free with Paleo Option!)
Wowzer!
I sure do go missing a lot. I have spurts of motivation, then I start working on something else, then I ……get sidetracked altogether, and here we are.
One thing I’d like to update you all on – if you didn’t know before, now ya do – I do Reiki sessions, and other energetic healing! If it’s not your cup of tea, I get it, but for those of you fabulous people that do, you can head on over to thedivine-house.com to check out what I do. I am working on the website, and what is more exciting, is that after getting my master certification in Herbalism earlier this year, I have been concocting cool stuff that I want to share with you too. Things like essential oil sprays, anointing oils, palo santo cleansing sprays… just to start.
Which leads me to my next point. This Saturday is a full moon, a blue moon (aka the second within a calendar month’s time), on Halloween. Days before Election Day, and the end of the current mercury retrograde. Is that not just the witchiest shit you’ve ever heard? Seriously. I’m so excited. Though a few of us are getting together to hide candy in random places in the little area next to the neighborhood for the kids, my real excitement will be bringing a blanket outside in the full moon, with all my crystals in tow, and a candle, to meditate in all my crunchy, spiritual, witchy, woo woo glory. At this point, (A friendly PSA: if you haven’t been vibing with this weirdness, you’ve either been missing out or you’re reading the wrong blog. Stay a while!)
So this full moon, and this astrological mind-warp black hole we’re in. I know you’ve been feeling it. We’ve entered Scorpio, which is very much an inner-angst, touchy-feely time. But! This full moon is one to bring about prosperity, albeit some intensity. It’s also a full moon situated in Taurus, which is super active and bright – totally opposite of the Scorpio times we’re in now. Though there’s a lot of opposition going on right now (lol), any full moon is a chance to cleanse and renew, releasing energy that is counterproductive to you. It may seem that we haven’t been making a lot of progress, seemingly even moving backwards (lol again), but this is just the pressure from both Mercury and Mars both being in retrograde – where those energies remain slow and stagnant. Interestingly enough, Mars returns correct on 11/3, which will calm a lot of unruly energy (last lol, promise. More of an eyeroll, if anything). The astrology for this time is absolutely nuts – while I don’t have the level of expertise that several do (studying it is just a hobby of mine), if you’re interested – please check out Elizabeth Frediani – an astrologer that a friend referred me to.
So what do we do in a time like this? I feel like everyone is fatigued – COVID fear, the holidays coming up, the election, general unrest…. How do we catch a break?
We take one. We deliberately choose to do so.
Whether it be getting your hair done, booking a massage, enjoying a day off, drinking your favorite wine (in moderation!), Zooming with family, or just getting outside and putting your bare feet in the grass while the weather still permits…. Now is a time where we have to be deliberate in taking time for ourselves. We have to be extra clear in our boundaries, extra clear in our beliefs, but also extra compassionate with those around us – but especially ourselves.
I think what was most refreshing about looking at astrology charts is that 2021 is expected to be largely positive, for pretty much everyone. Having that hope, whether it’s anecdotal or not, just makes me feel a bit more excited to move through the literal dumpster fire that is/was 2020.
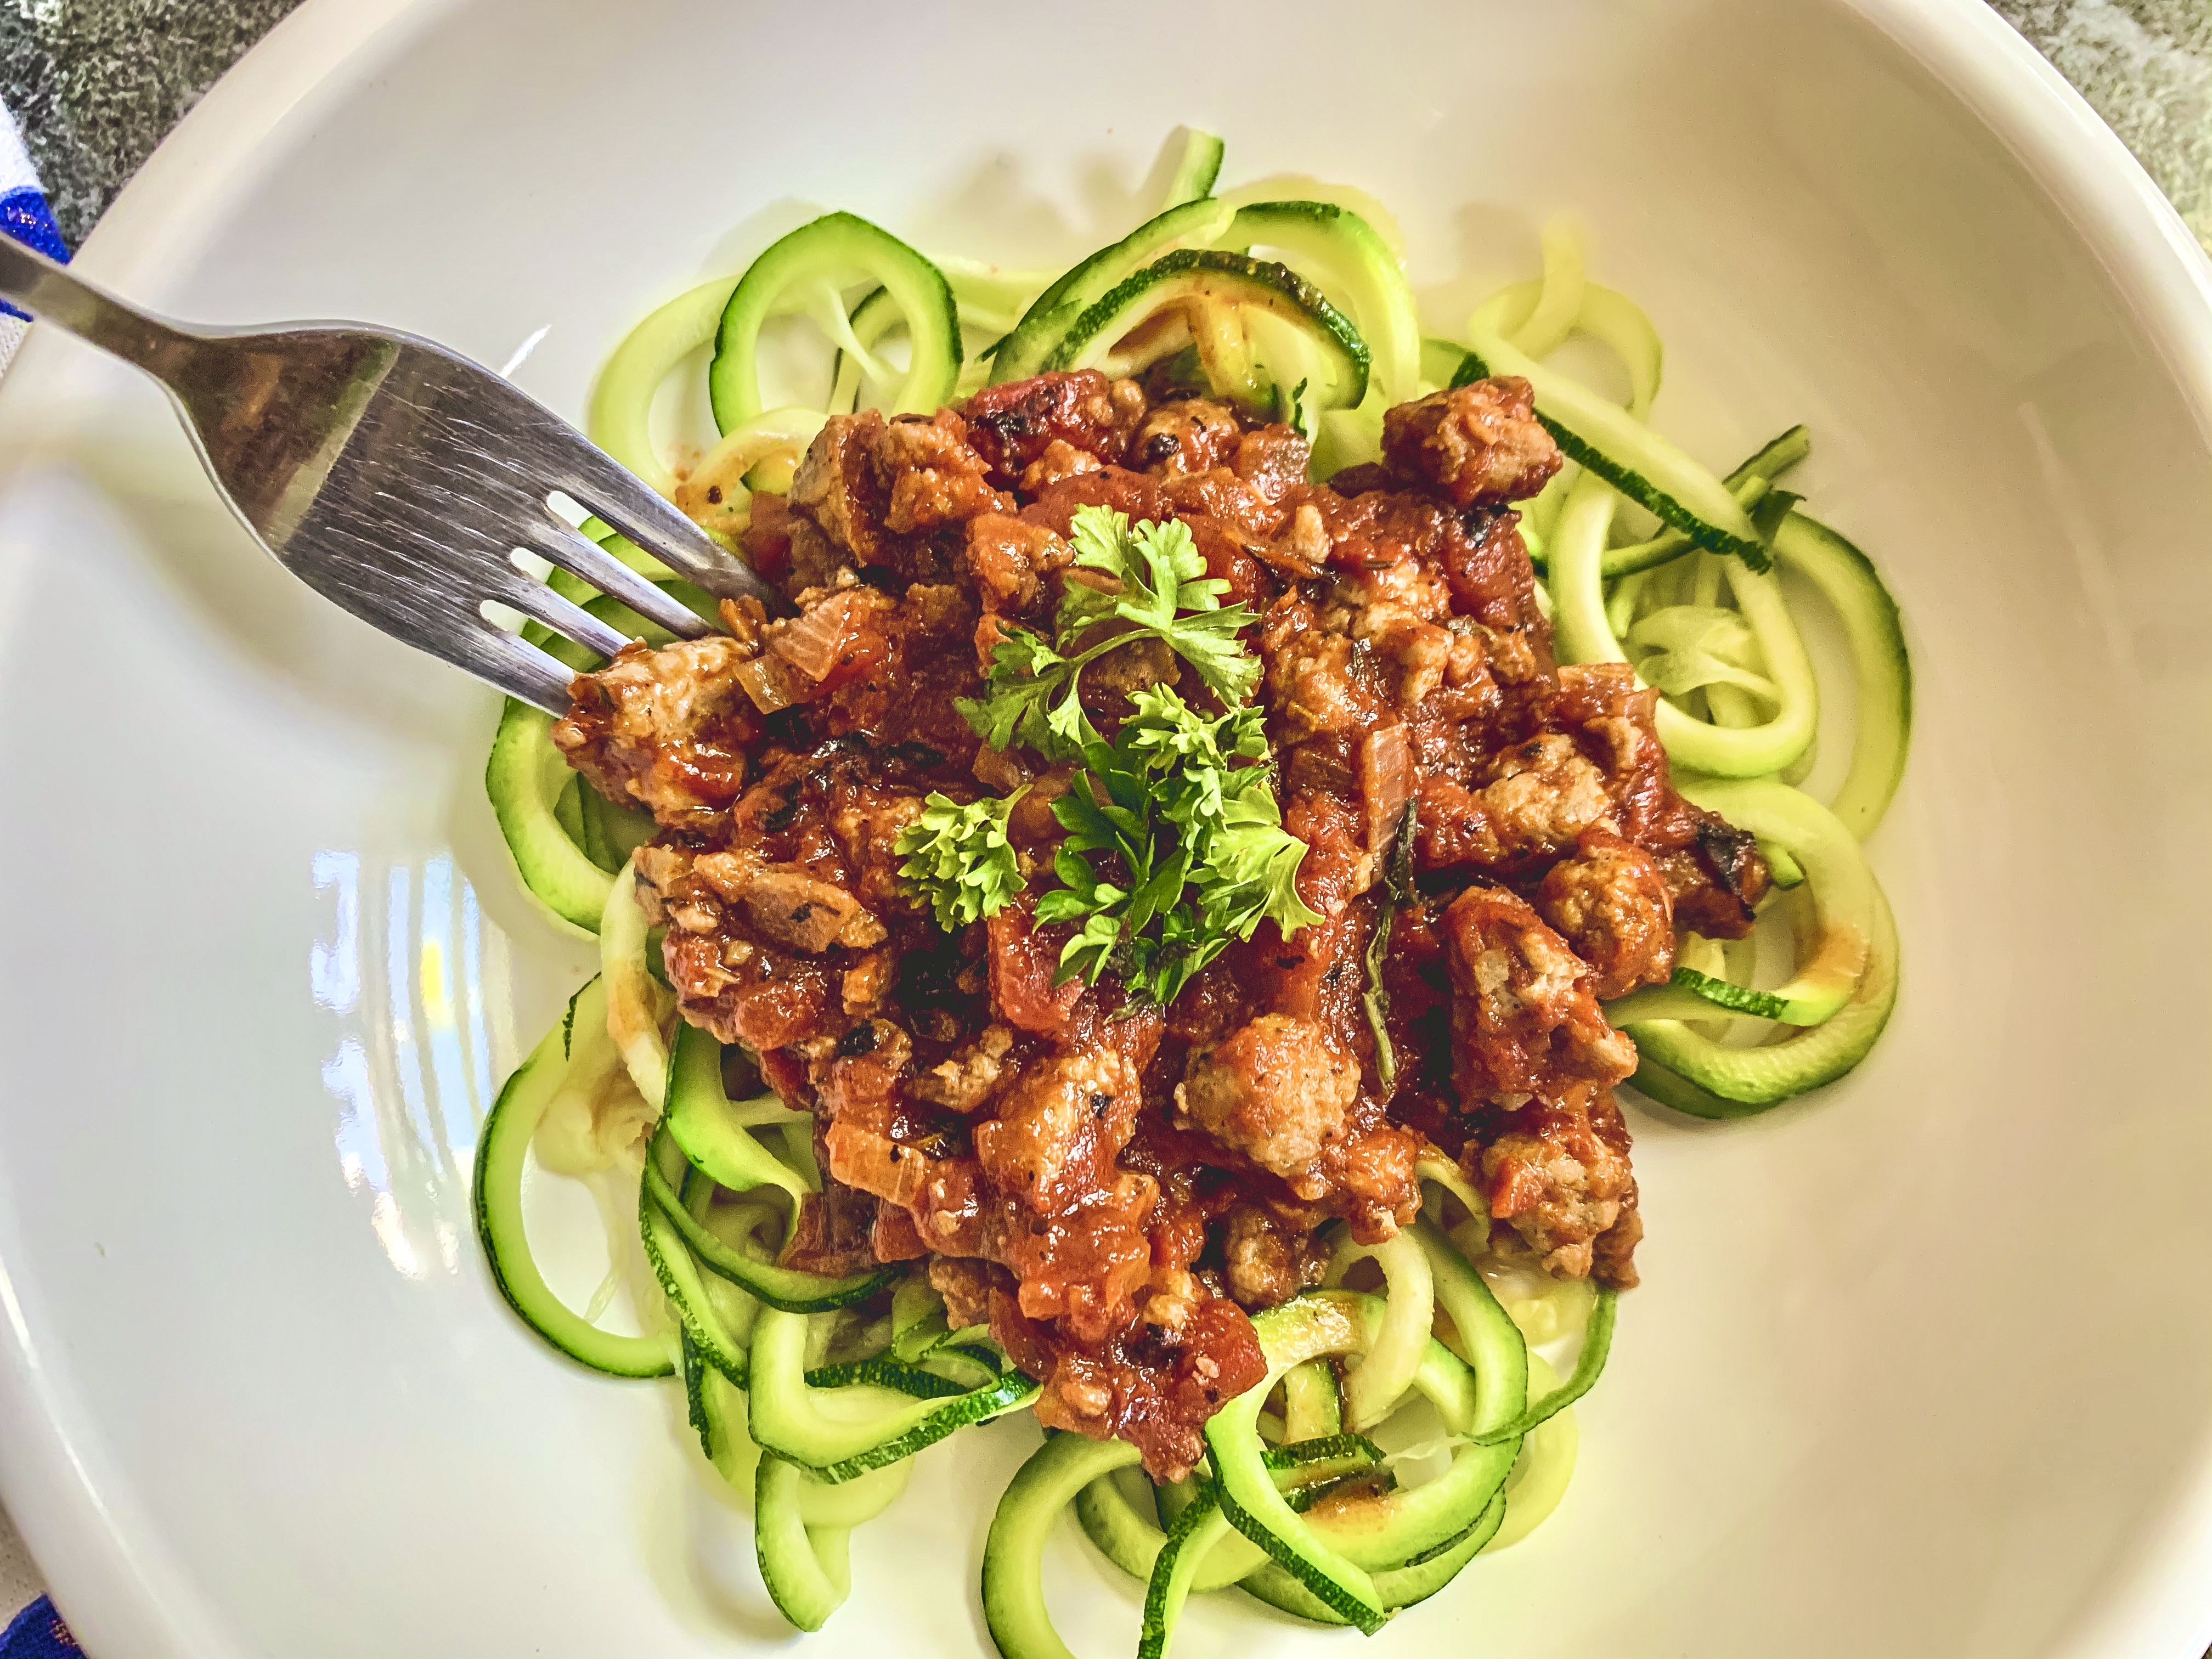
So let’s eat. I have a few recipes that I’ll share this week, but this one is one of my favorites. I try to make as much food from other types of culture and cuisine as much as possible – I find it’s really helpful to understand flavor profiles of different spices. Also, while continuing to eat in a ketogenic, low/no carb fashion, I have to get pretty creative. This particular dinner was inspired by some of my absolute favorite food – GREEK FOOD, ugh. Love it.
These are super easy to pull off last minute, or to plan ahead for. I use boneless, skinless canned salmon, which you can keep in your cabinet for a long time. Mixing some fresh herbs into everything just makes it all so delicious.
Lemon Dill Salmon Cakes with Cucumber Tzatziki Sauce (Gluten-Free with Paleo Option!)
Prep time: 20 min
Cook time: 15 min
Ingredients
- 2 cans of boneless, skinless salmon, drained
- 1 egg
- 1 heaping tbsp of flax meal
- 1 garlic clove, minced or pressed
- 1 tsp dried parsley
- 1 tsp dried dill
- 1 tsp paprika
- sprinkle of dried oregano
- ½ tsp salt, plus more to taste
- 1 tsp lemon zest
For the sauce
- 1 cup of greek yoghurt, or sour cream (almond milk greek style yoghurt or sour cream is a good substitute for paleo!)
- 1 heaping tsp of dried dill
- 1 tbsp chopped fresh parsley
- 1 tbsp chopped fresh mint
- 1 large garlic clove, minced or pressed
- juice from one lemon
- ½ cup of finely chopped cucumber (about half of a large cucumber)
- salt, to taste
Directions
- Preheat your oven to 350 degrees F. Line a baking sheet with parchment paper or greased foil.
- In a large mixing bowl, add your salmon, breaking apart with a fork. Add all of your salmon cake ingredients to the bowl, mixing thoroughly – EXCEPT your egg. Since canned salmon is already cooked, I do a quick taste test to see if it needs anything.
- Once I’ve added anything (salt, more dill, garlic, etc), then I whisk my egg into the mix, continuing to gently fold everything together.
- Shape into patties – you should be able to get about 6-8 patties, similar to crab cake sizes. If your mix is too sticky, feel free to add more flax seed, a tsp at a time. If your mix is too thick, a tsp of olive oil should loosen everything up. Space your patties 2-4 inches apart, depending on the size of your baking sheet. Bake until golden brown, about 12-15 minutes.
- Meanwhile, in a smaller mixing bowl, whisk your yoghurt ingredients together – yoghurt, dill, parsley, garlic, lemon juice, and cucumber. Add preferred amount of salt. If you aren’t familiar with this type of flavor, I like to make sure mine is tangy from the lemon, zesty from the garlic, fresh tasting from the herbs, but cooling – I find that adding the salt last lets you control how bold of an overall flavor you get. I should note – additional zest from that lemon can always be used to add more flavor, if needed. Set aside in the fridge while the salmon patties continue to cook.
- Once the salmon patties are done, serve with a dollop of your tzatziki sauce. If you’re a sauce-heathen like me, just straight up drench them. Please know that I smothered mine, these photos don’t capture the accurate sauce to patty ratio. You can always pair them with a few nice salads, too…
Enjoy!
-S